Amazon Athena Connector for JAVAAmazon Athena Connector allows to connect to serverless, interactive analytics service that provides a simplified and flexible way to analyze petabytes of data where it lives. In this article you will learn how to integrate Amazon Athena data in JAVA. We will use high-performance Amazon Athena Connector to easily connect to Amazon Athena and then access the data inside JAVA. While direct JDBC connections are possible, the aim of this article is to show you how to connect to Amazon Athena via a gateway. One reason you would want this is to control accessibility to Amazon Athena in one central place. Let's follow the steps below to see how we can accomplish that! Amazon Athena Connector for JAVA is based on ZappySys JDBC Bridge Driver which is part of ODBC PowerPack. It is a collection of high-performance ODBC drivers that enable you to integrate data in SQL Server, SSIS, a programming language, or any other ODBC-compatible application. ODBC PowerPack supports various file formats, sources and destinations, including REST/SOAP API, SFTP/FTP, storage services, and plain files, to mention a few. |
Connect to Amazon Athena in other apps
|
Prerequisites
Before we begin, make sure you meet the following prerequisite:
-
Java 8 Runtime Environment (JRE) installed. It is recommended to use these distributions:
Download Amazon Athena JDBC driver
To connect to Amazon Athena in JAVA, you will have to download JDBC driver for it, which we will use in later steps. Let's perform these little steps right away:
- Visit Amazon Athena official website.
-
Download the JDBC driver, and save it locally,
e.g. to
D:\Drivers\JDBC\athena-jdbc.jar. - Done! That was easy, wasn't it? Let's proceed to the next step.
Create Data Source in ZappySys Data Gateway based on JDBC Bridge Driver
-
Download and install ODBC PowerPack.
-
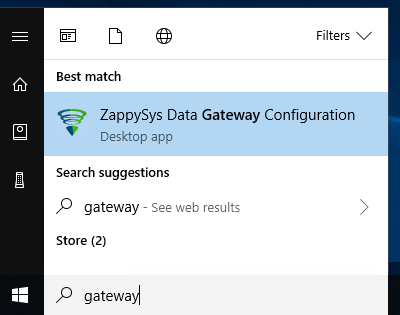
Search for gateway in start menu and Open ZappySys Data Gateway:
-
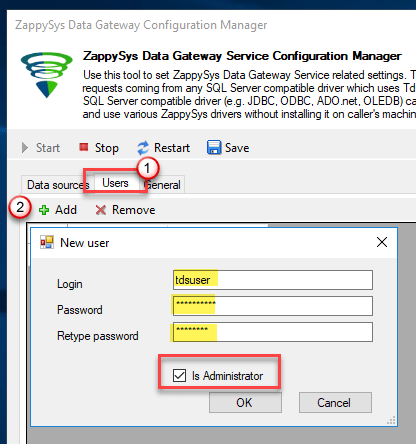
Go to Users Tab to add our first Gateway user. Click Add; we will give it a name tdsuser and enter password you like to give. Check Admin option and click OK to save. We will use these details later when we create linked server:
-
Now we are ready to add a data source. Click Add, give data source a name (Copy this name somewhere, we will need it later) and then select Native - ZappySys JDBC Bridge Driver. Finally, click OK, and it will create the Data Set for it and open the ZS driver UI.
AmazonAthenaDSNNative - ZappySys JDBC Bridge Driver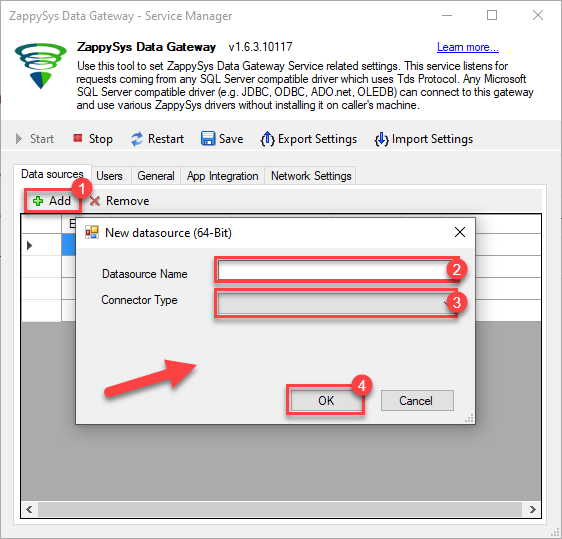
-
Now, we need to configure the JDBC connection in the new ODBC data source. Simply enter the Connection string, credentials, configure other settings, and then click Test Connection button to test the connection:
AmazonAthenaDSNjdbc:athena://WorkGroup=primary;Region=us-east-1;Catalog=MyAwsDataCatalog;OutputLocation=s3://my-s3-bucket/;com.amazon.athena.jdbc.AthenaDriverD:\Drivers\JDBC\athena-jdbc.jarAKIAIOSFODNN7EXAMPLE******************************[]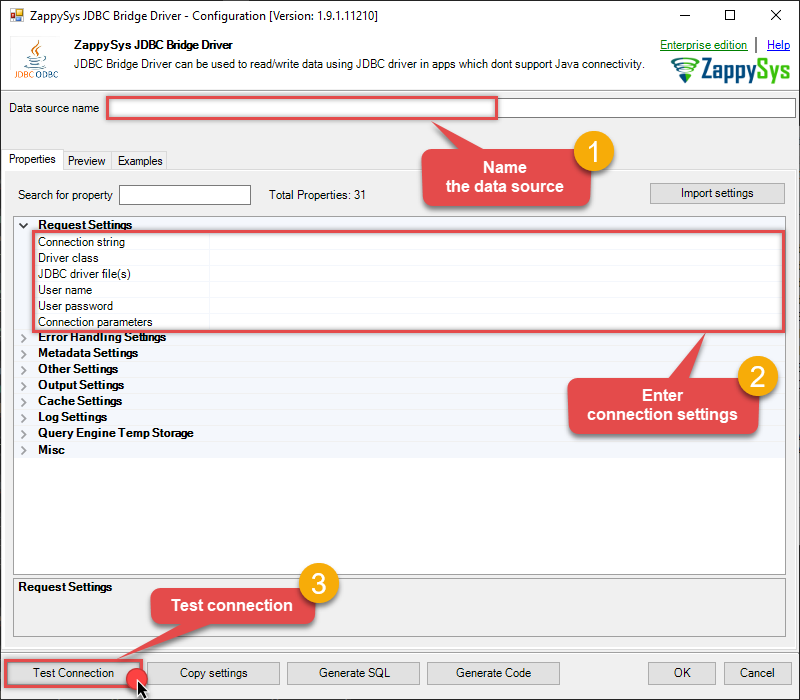
Use these values when setting parameters:
-
Connection string :jdbc:athena://WorkGroup=primary;Region=us-east-1;Catalog=MyAwsDataCatalog;OutputLocation=s3://my-s3-bucket/; -
Driver class :com.amazon.athena.jdbc.AthenaDriver -
JDBC driver file(s) :D:\Drivers\JDBC\athena-jdbc.jar -
User name :AKIAIOSFODNN7EXAMPLE -
User password :****************************** -
Connection parameters :[]
-
-
You should see a message saying that connection test is successful:
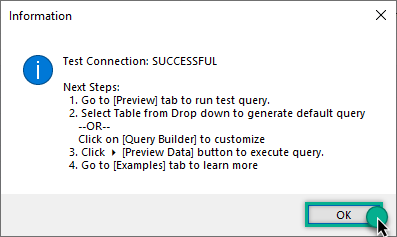
Otherwise, if you are getting an error, check out our Community for troubleshooting tips.
-
We are at the point where we can preview a SQL query. For more SQL query examples visit JDBC Bridge documentation:
AmazonAthenaDSNSELECT * FROM "r53_rlogs" ORDER BY query_timestamp DESC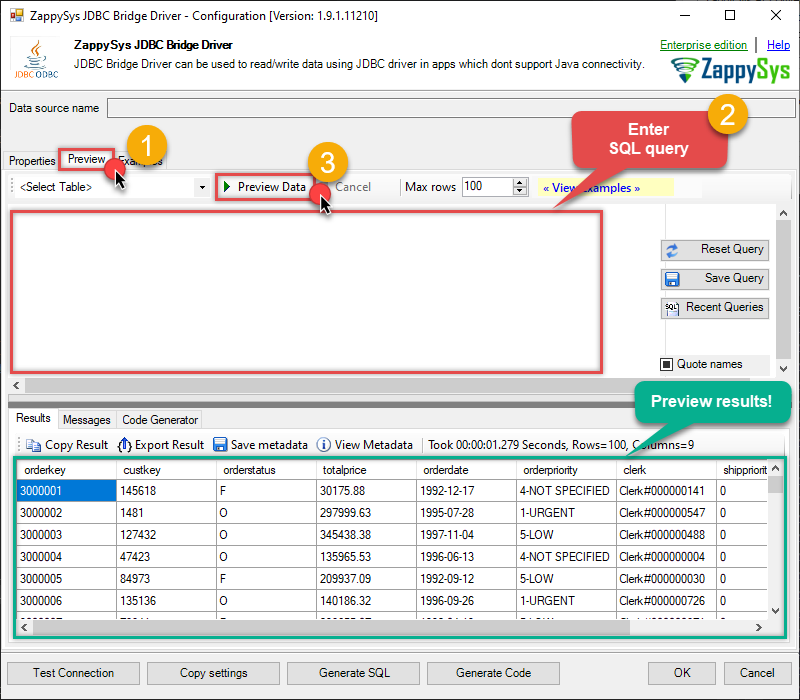
SELECT * FROM "r53_rlogs" ORDER BY query_timestamp DESCYou can also click on the <Select Table> dropdown and select a table from the list.The ZappySys JDBC Bridge Driver acts as a transparent intermediary, passing SQL queries directly to the Trino JDBC driver, which then handles the query execution. This means the Bridge Driver simply relays the SQL query without altering it.
Some JDBC drivers don't support
INSERT/UPDATE/DELETEstatements, so you may get an error saying "action is not supported" or a similar one. Please, be aware, this is not the limitation of ZappySys JDBC Bridge Driver, but is a limitation of the specific JDBC driver you are using. -
Click OK to finish creating the data source.
-
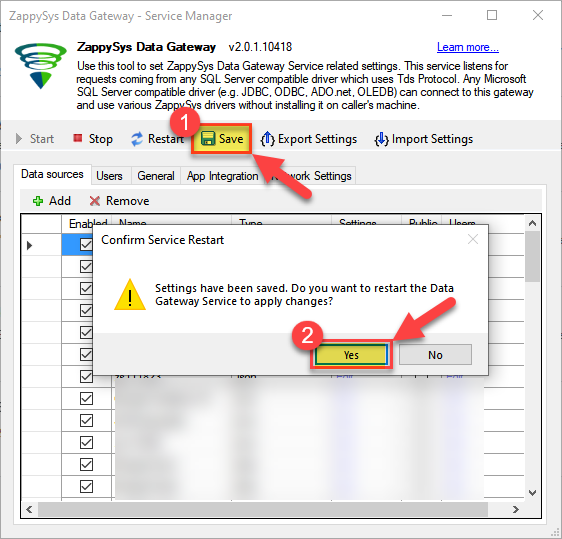
Most Important Step: Now, After creating or modifying a data source in ZappySys Data Gateway, make sure to click the SAVE button to preserve your changes.
Then, RESTART the Data Gateway service to ensure all changes are properly applied.Skipping either step may result in the new settings not taking effect.
Read data in Java from the DSN
-
Java code to get the data:
"jdbc:sqlserver://localhost:5000;databasename=AmazonAthenaDSN;user=tdsuser;password=test"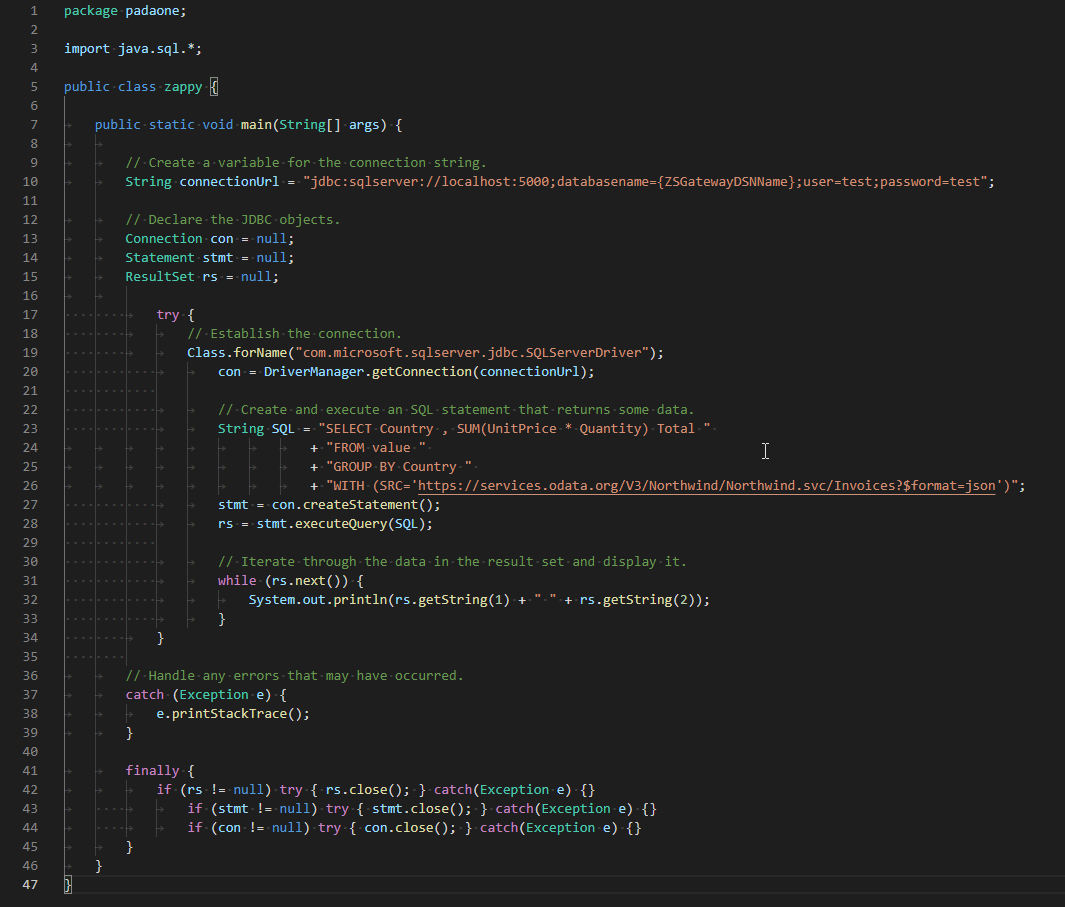
-
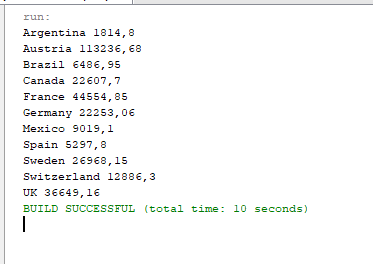
When you run the code it will make the API call and read the data:
-
Here is Java program's code in text format:
//Step-1: Install ZappySys ODBC PowerPack and Configure Data Gateway

//Step-2:Assuming the Microsoft SQL Server JDBC Driver is in below folder
//C:\Program Files\Microsoft Jdbc Driver 6.0 for SQL Server\sqljdbc_6.0\enu\auth\x64
package padaone;

import java.sql.*;

public class zappy {

    public static void main(String[] args) {

        // Create a variable for the connection string.
        String connectionUrl = "jdbc:sqlserver://localhost:5000;databasename=AmazonAthenaDSN;user=test;password=test";

        // Declare the JDBC objects.
        Connection con = null;
        Statement stmt = null;
        ResultSet rs = null;

            try {
                // Establish the connection.
                Class.forName("com.microsoft.sqlserver.jdbc.SQLServerDriver");
                con = DriverManager.getConnection(connectionUrl);

                // Create and execute an SQL statement that returns some data.
                String SQL = "SELECT Country , SUM(UnitPrice * Quantity) Total "
                           + "FROM value "
                           + "GROUP BY Country "
                           + "WITH (SRC='https://services.odata.org/V3/Northwind/Northwind.svc/Invoices?$format=json')";
                stmt = con.createStatement();
                rs = stmt.executeQuery(SQL);

                // Iterate through the data in the result set and display it.
                while (rs.next()) {
                    System.out.println(rs.getString(1) + " " + rs.getString(2));
                }
            }

        // Handle any errors that may have occurred.
        catch (Exception e) {
            e.printStackTrace();
        }

        finally {
            if (rs != null) try { rs.close(); } catch (Exception e) {}
            if (stmt != null) try { stmt.close(); } catch (Exception e) {}
            if (con != null) try { con.close(); } catch (Exception e) {}
        }
    }
}
Conclusion
In this article we showed you how to connect to Amazon Athena in JAVA and integrate data without any coding, saving you time and effort. It's worth noting that ZappySys JDBC Bridge Driver allows you to connect not only to Amazon Athena, but to any Java application that supports JDBC (just use a different JDBC driver and configure it appropriately).
We encourage you to download Amazon Athena Connector for JAVA and see how easy it is to use it for yourself or your team.
If you have any questions, feel free to contact ZappySys support team. You can also open a live chat immediately by clicking on the chat icon below.
Download Amazon Athena Connector for JAVA Documentation


