
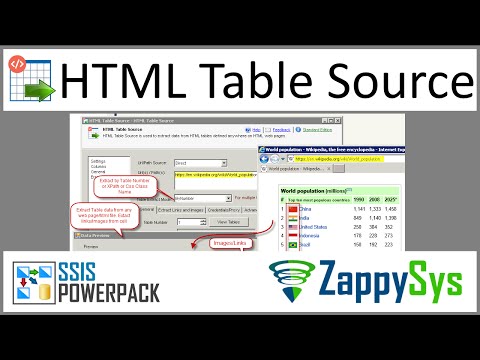
HTML Table Connector for SSIS
SSIS HTML Table Source can be used for web scraping (extracting HTML table content placed inside TABLE tags). Many times valuable information stored on web pages and not available to download as traditional data file format. With this Component you can do Web content scraping to extract HTML data in few click without learning Complex APIs.
In this article you will learn how to quickly and efficiently integrate HTML Table data in SSIS without coding. We will use high-performance HTML Table Connector to easily connect to HTML Table and then access the data inside SSIS.
Let's follow the steps below to see how we can accomplish that!
HTML Table Connector for SSIS is based on ZappySys Native SSIS Connector Framework which is a part of SSIS PowerPack. It is a collection of high-performance SSIS connectors that enable you to integrate data with virtually any data provider supported by SSIS, including SQL Server. SSIS PowerPack supports various file formats, sources and destinations, including REST/SOAP API, SFTP/FTP, storage services, and plain files, to mention a few (if you are new to SSIS and SSIS PowerPack, find out more on how to use them).
Video Tutorial - Integrate HTML Table data in SSIS
This video covers the following topics and more, so please watch carefully. After watching the video, follow the steps outlined in this article:
- How to download and install the required PowerPack for
HTML Table integration in SSIS - How to configure the connection for
HTML Table - Features of the
Source (Authentication / Query Language / Examples / Driver UI) - How to use the
HTML Table in SSIS
Prerequisites
Before we begin, make sure the following prerequisites are met:
- SSIS designer installed. Sometimes it is referred as BIDS or SSDT (download it from Microsoft).
- Basic knowledge of SSIS package development using Microsoft SQL Server Integration Services.
- ODBC PowerPack is installed (if you are new to SSIS PowerPack, then get started!).
Read data from HTML Table in SSIS using HTML Table Source
This section provides a practical guide on how to extract data from HTML Table using the HTML Table Source component within SSIS (SQL Server Integration Services) via the ZappySys PowerPack.
-
Begin with opening Visual Studio and Create a New Project.
-
Select Integration Service Project and in new project window set the appropriate name and location for project. And click OK.
In the new SSIS project screen you will find the following:
- SSIS ToolBox on left side bar
- Solution Explorer and Property Window on right bar
- Control flow, data flow, event Handlers, Package Explorer in tab windows
- Connection Manager Window in the bottom
 Note: If you don't see ZappySys SSIS PowerPack Task or Components in SSIS Toolbox, please refer to this help link.
 -
Now, Drag and Drop SSIS Data Flow Task from SSIS Toolbox. Double click on the Data Flow Task to see Data Flow designer.

-
From the SSIS toolbox drag and drop HTML Table Source on the dataflow designer surface

-
Double click on HTML Table Source component to configure it.
-
Configure the HTML Table Source (Using Table Number)
- Set the Access Mode: In the Access Mode dropdown, select
Direct. This indicates that we will be providing a web address directly. -
Specify the URL: In the URL field, paste the URL of the Wikipedia page containing the table you want to extract.
For this example, use:https://en.wikipedia.org/wiki/World_population - Select Extraction Mode: In the Table Extract Mode dropdown, choose
By Number. This tells the component that we will identify the table based on its position on the webpage. - Enter the Table Number: In the Table Number field, specify the numerical order of the table you want to extract on the Wikipedia page.
Tables are numbered sequentially from top to bottom, starting with 1.

- Set the Access Mode: In the Access Mode dropdown, select
-
Data Preview and Saving:
- Click the Preview button to view a sample of the data that will be extracted. This allows you to verify your configuration.
- Click the OK button to save the configuration settings for the HTML Table Source.
That's it. Now you can now connect the HTML Table Source to other data flow components, such as a Destination component, to load the extracted data into a database, file, or other destination.
How to extract table data using ByCSS mode
- In the Table Extract Mode dropdown, choose
By CSS. This tells the component that we will identify the table based on CSS class on the webpage. -
In the Table CSS Class field, use the CSS class that identifies the table you want to extract. For instance, to extract an infobox table, you might use
infobox.- Finding the CSS Class: To identify the correct CSS class, use your browser’s developer tools (usually by right-clicking on the table and selecting Inspect or Inspect Element). Look for the
<table>tag and itsclassattribute.

- Finding the CSS Class: To identify the correct CSS class, use your browser’s developer tools (usually by right-clicking on the table and selecting Inspect or Inspect Element). Look for the
How to extract table data using XPath mode
- In the Table Extract Mode dropdown, choose
By XPath. This tells the component that we will identify the table based on table XPath on the webpage. -
In the “Table XPath” field, enter the XPath expression that uniquely identifies the table. You can often incorporate CSS class names into your XPath.
For example, to target a table with the class infobox, you can use the following XPath:XQuery//table[@class='infobox']- Understanding XPath: XPath is a query language for selecting nodes in an XML or HTML document.
The expression//tableselects all<table>elements, and[@class='infobox']filters those tables to only include those where the class attribute is equal toinfobox. - Finding the Table XPath: You can often get a suitable XPath by using your browser’s developer tools.
Inspect the table element, right-click on it in the Elements panel, and look for options likeCopy XPathorCopy full XPath. You might need to adjust the copied XPath to be more robust.

- Understanding XPath: XPath is a query language for selecting nodes in an XML or HTML document.
Load HTML Table data into SQL Server using Upsert Destination (Insert or Update)
Once you configured the data source, you can load HTML Table data into SQL Server using Upsert Destination.
Upsert Destination can merge or synchronize source data with the target table.
It supports Microsoft SQL Server, PostgreSQL, and Redshift databases as targets.
Upsert Destination also supports very fast bulk upsert operation along with bulk delete.
Upsert operation
- a database operation which performs INSERT or UPDATE SQL commands
based on record's existence condition in the target table.
It
Upsert Destination supports INSERT, UPDATE, and DELETE operations,
so it is similar to SQL Server's MERGE command, except it can be used directly in SSIS package.
-
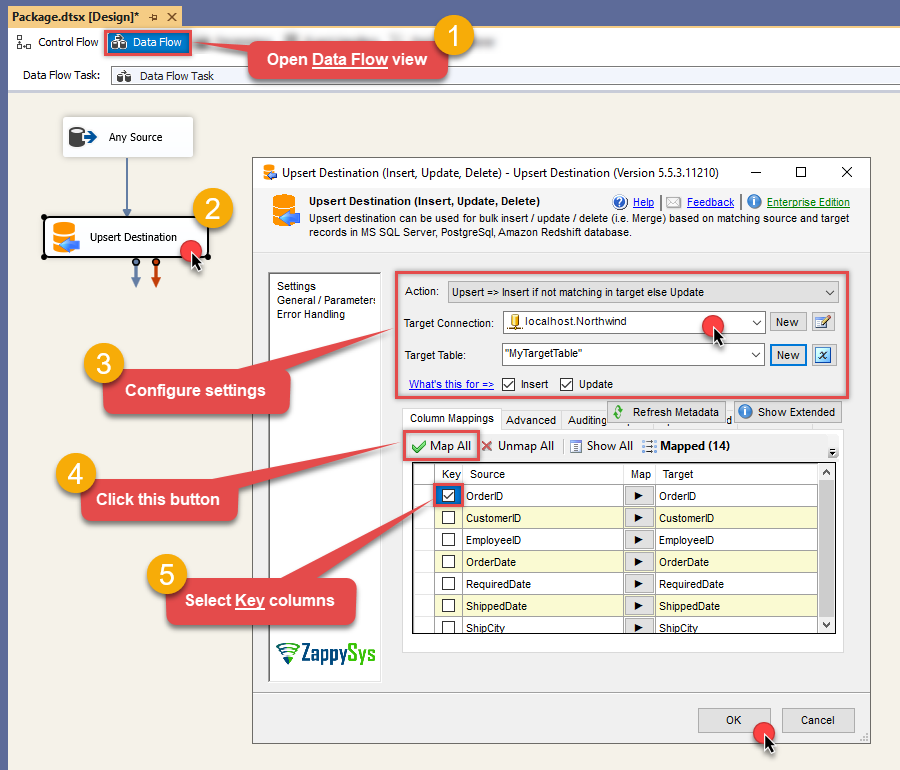
From the SSIS Toolbox drag-and-drop Upsert Destination component onto the Data Flow designer background.
-
Connect your SSIS source component to Upsert Destination.
-
Double-click on Upsert Destination component to open configuration window.
-
Start by selecting the Action from the list.
-
Next, select the desired target connection or create one by clicking <New [provider] Connection> menu item from the Target Connection dropdown.
-
Then select a table from the Target Table list or click New button to create a new table based on the source columns.
-
Continue by checking Insert and Update options according to your scenario (e.g. if Update option is unchecked, no updates will be made).
-
Finally, click Map All button to map all columns and then select the Key columns to match the columns on:
-
Click OK to save the configuration.
-
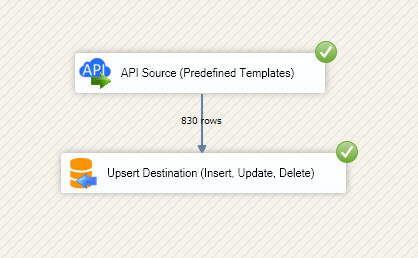
Run the package and HTML Table data will be merged with the target table in SQL Server, PostgreSQL, or Redshift:
-
Done!
Deploy and schedule SSIS package
After you are done creating SSIS package, most likely, you want to deploy it to SQL Server Catalog and run it periodically. Just follow the instructions in this article:
Running SSIS package in Azure Data Factory (ADF)
To use SSIS PowerPack in ADF, you must first prepare Azure-SSIS Integration Runtime. Follow this link for detailed instructions:
Conclusion
In this article we showed you how to connect to HTML Table in SSIS and integrate data without any coding, saving you time and effort.
We encourage you to download HTML Table Connector for SSIS and see how easy it is to use it for yourself or your team.
If you have any questions, feel free to contact ZappySys support team. You can also open a live chat immediately by clicking on the chat icon below.
Download HTML Table Connector for SSIS Documentation


 Connector")


 Connector")


 Connector")


