
Trino Connector for SSISTrino Connector empowers you to query diverse Trino data sources to perform comprehensive analytics effortlessly. In this article you will learn how to quickly and efficiently integrate Trino data in SSIS without coding. We will use high-performance Trino Connector to easily connect to Trino and then access the data inside SSIS. Let's follow the steps below to see how we can accomplish that! Trino Connector for SSIS is based on ZappySys JDBC Bridge Driver which is part of ODBC PowerPack. It is a collection of high-performance ODBC drivers that enable you to integrate data in SQL Server, SSIS, a programming language, or any other ODBC-compatible application. ODBC PowerPack supports various file formats, sources and destinations, including REST/SOAP API, SFTP/FTP, storage services, and plain files, to mention a few. |
Connect to Trino in other apps
|
Prerequisites
Before we begin, make sure you meet the following prerequisite:
-
Java 8 Runtime Environment (JRE) installed. It is recommended to use these distributions:
Download Trino JDBC driver
To connect to Trino in SSIS, you will have to download JDBC driver for it, which we will use in later steps. Let's perform these little steps right away:
- Visit Trino website.
-
Follow the instructions there, download the JDBC driver, and save it locally,
e.g. to
D:\Drivers\JDBC\trino-jdbc.jar.It is recommended to use JDBC driver compiled for Java 8, if possible. - Done! That was easy, wasn't it? Let's proceed to the next step.
Create ODBC Data Source (DSN) based on ZappySys JDBC Bridge Driver
Step-by-step instructions
To get data from Trino using SSIS we first need to create a DSN (Data Source) which will access data from Trino. We will later be able to read data using SSIS. Perform these steps:
-
Download and install ODBC PowerPack.
-
Open ODBC Data Sources (x64):

-
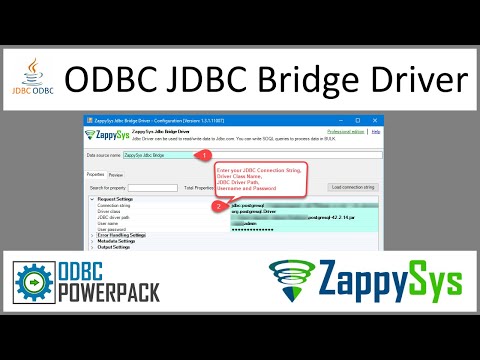
Create a User data source (User DSN) based on ZappySys JDBC Bridge Driver
ZappySys JDBC Bridge Driver
-
Create and use User DSN
if the client application is run under a User Account.
This is an ideal option
in design-time , when developing a solution, e.g. in Visual Studio 2019. Use it for both type of applications - 64-bit and 32-bit. -
Create and use System DSN
if the client application is launched under a System Account, e.g. as a Windows Service.
Usually, this is an ideal option to use
in a production environment . Use ODBC Data Source Administrator (32-bit), instead of 64-bit version, if Windows Service is a 32-bit application.
SSIS uses a Service Account, when a solution is deployed to production environment, therefore for production environment you have to create and use a System DSN. -
Create and use User DSN
if the client application is run under a User Account.
This is an ideal option
-
Now, we need to configure the JDBC connection in the new ODBC data source. Simply enter the Connection string, credentials, configure other settings, and then click Test Connection button to test the connection:
TrinoDSNjdbc:trino://trino-instance-host-name:8080D:\Drivers\JDBC\trino-jdbc.jaradmin****************[]
Use these values when setting parameters:
-
Connection string :jdbc:trino://trino-instance-host-name:8080 -
JDBC driver file(s) :D:\Drivers\JDBC\trino-jdbc.jar -
User name :admin -
User password :**************** -
Connection parameters :[]
-
-
You should see a message saying that connection test is successful:

Otherwise, if you are getting an error, check out our Community for troubleshooting tips.
-
We are at the point where we can preview a SQL query. For more SQL query examples visit JDBC Bridge documentation:
TrinoDSNSELECT * FROM tpch.sf1.orders
SELECT * FROM tpch.sf1.ordersYou can also click on the <Select Table> dropdown and select a table from the list.The ZappySys JDBC Bridge Driver acts as a transparent intermediary, passing SQL queries directly to the Trino JDBC driver, which then handles the query execution. This means the Bridge Driver simply relays the SQL query without altering it.
Some JDBC drivers don't support
INSERT/UPDATE/DELETEstatements, so you may get an error saying "action is not supported" or a similar one. Please, be aware, this is not the limitation of ZappySys JDBC Bridge Driver, but is a limitation of the specific JDBC driver you are using. -
Click OK to finish creating the data source.
How to read Trino data in SSIS
In this section we will learn how to configure and use Trino Connector in the ODBC Source to get data from Trino.
-
Begin with opening Visual Studio and Create a New Project.
Select Integration Service Project and in new project window set the appropriate name and location for project. And click OK.
-
Now, Drag and Drop SSIS Data Flow Task from SSIS Toolbox. Double click on the Data Flow Task to see Data Flow designer.

-
From the SSIS toolbox drag and drop ODBC Source on the dataflow designer surface:

-
Double-click on ODBC Source component to configure it.
-
Click on New... button, it will open Configure ODBC Connection Manager window. Once it opens, click on New... button to create a new ODBC connection to Trino ODBC data source:

-
Then choose the data source from the list and click Test Connection button. If the connection test is successful, close the window, and then click OK button to finish the configuration:
TrinoDSN
-
Once we configured the ODBC connection, we are ready to configure the data source. First, choose Data access mode:
Table NameorSQL command. Then select a table from the list or enter your SQL query, appropriately. Finally, hit Preview... button to preview the results and click OK button to close the window.TrinoDSN"schema"."orders"
-
That's it, we are done! Now you can read Trino data in SSIS.
Video Tutorial
Load Trino data into SQL Server using Upsert Destination (Insert or Update)
Once you configured the data source, you can load Trino data into SQL Server using Upsert Destination.
Upsert Destination can merge or synchronize source data with the target table.
It supports Microsoft SQL Server, PostgreSQL, and Redshift databases as targets.
Upsert Destination also supports very fast bulk upsert operation along with bulk delete.
Upsert operation
- a database operation which performs INSERT or UPDATE SQL commands
based on record's existence condition in the target table.
It
Upsert Destination supports INSERT, UPDATE, and DELETE operations,
so it is similar to SQL Server's MERGE command, except it can be used directly in SSIS package.
-
Download and install SSIS PowerPack.
-
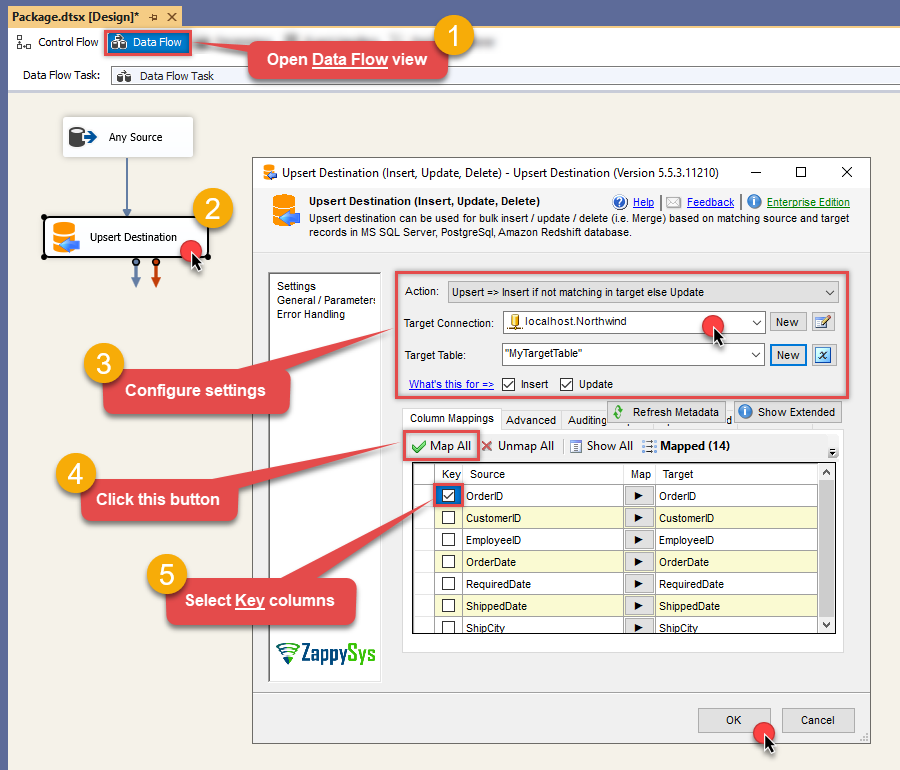
From the SSIS Toolbox drag-and-drop Upsert Destination component onto the Data Flow designer background.
-
Connect your SSIS source component to Upsert Destination.
-
Double-click on Upsert Destination component to open configuration window.
-
Start by selecting the Action from the list.
-
Next, select the desired target connection or create one by clicking <New [provider] Connection> menu item from the Target Connection dropdown.
-
Then select a table from the Target Table list or click New button to create a new table based on the source columns.
-
Continue by checking Insert and Update options according to your scenario (e.g. if Update option is unchecked, no updates will be made).
-
Finally, click Map All button to map all columns and then select the Key columns to match the columns on:
-
Click OK to save the configuration.
-
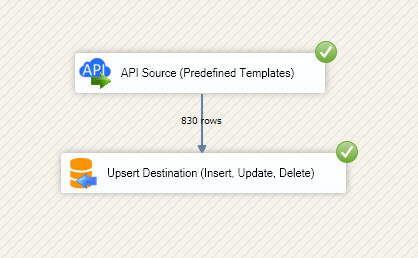
Run the package and Trino data will be merged with the target table in SQL Server, PostgreSQL, or Redshift:
-
Done!
Deploy and schedule SSIS package
After you are done creating SSIS package, most likely, you want to deploy it to SQL Server Catalog and run it periodically. Just follow the instructions in this article:
Conclusion
In this article we showed you how to connect to Trino in SSIS and integrate data without any coding, saving you time and effort. It's worth noting that ZappySys JDBC Bridge Driver allows you to connect not only to Trino, but to any Java application that supports JDBC (just use a different JDBC driver and configure it appropriately).
We encourage you to download Trino Connector for SSIS and see how easy it is to use it for yourself or your team.
If you have any questions, feel free to contact ZappySys support team. You can also open a live chat immediately by clicking on the chat icon below.
Download Trino Connector for SSIS Documentation
More integrations
Other connectors for SSIS


 Connector")


 Connector")


 Connector")


Other application integration scenarios for Trino
How to connect Trino in SSIS?
How to get Trino data in SSIS?
How to read Trino data in SSIS?
How to load Trino data in SSIS?
How to import Trino data in SSIS?
How to pull Trino data in SSIS?
How to push data to Trino in SSIS?
How to write data to Trino in SSIS?
How to POST data to Trino in SSIS?
Call Trino API in SSIS
Consume Trino API in SSIS
Trino SSIS Automate
Trino SSIS Integration
Integration Trino in SSIS
Consume real-time Trino data in SSIS
Consume real-time Trino API data in SSIS
Trino ODBC Driver | ODBC Driver for Trino | ODBC Trino Driver | SSIS Trino Source | SSIS Trino Destination
Connect Trino in SSIS
Load Trino in SSIS
Load Trino data in SSIS
Read Trino data in SSIS
Trino API Call in SSIS